Disc Fitment and Information

Price are inclusive of 20% VAT. Taxes will be removed at the check out where applicable.

Motorcycle Disc brakes : what they are, how they work and how to fit them...

The disc brake is a wheel brake which works by stopping the motorcycle wheel from rotating using friction. The friction is caused by pushing the brake pads against the brake discs hydraulically, using a set of calipers. The brake disc is connected to the wheel and/or the axle and this friction causes the wheel to slow down or stop by converting the motion (or kinetic energy) to heat. Disc brakes first appeared in 1962 but have evolved and become more sophisticated since then.
There are several different types of disc brakes available now:

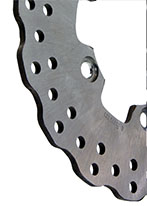
example of a solid motorcycle brake disc
Solid Disc
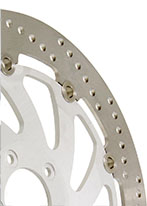
example of a floating motorcycle brake disc
Floating Disc
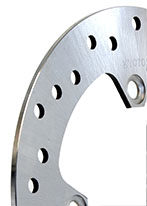
example of a solid wavy motorcycle brake disc
Solid Wavy Disc
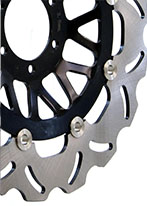
example of a floating wavy motorcycle brake disc
Floating Wavy Disc
Drilled or Slotted Discs:

These are disc brakes with holes or slots drilled into them. This serves several purposes, the holes let the rainwater through them more easily so that the brake discs don't get so slippery when it's wet. They also cool more quickly helping the efficiency of the brakes by preventing overheating. Slots machined in the disc aid the removal of dust and oil residue and help to deglaze the brake discs so that they are less slippery.

Floating Discs:

These are discs which are loosely fitted and rest on small dowels which allow them to move slightly laterally. The advantage of this is that it prevents heat transfer from the brake to the wheel hub and gives the disc space to expand into when heated by friction, without causing tension which might lead to eventual warping. It also allows the disc to be centred better when used with a fixed caliper.

Wave or Contour Discs:

These discs are relatively new on the market and have holes in them and a 'wavy' outside edge. This provides a more efficient area of pad contact compared to standard round discs. They allow for more heat dissipation as well.

Well known manufacturer's disc brake fitting instructions and possible hazards:

  • Due to the manufacturing process, when you buy new brake discs they may be covered in a residue of oil so please clean and degrease them with soap and water before fitting them.
  • First remove the old disc and check the condition of the mounting screws, replacing any damaged or worn ones as necessary.
  • Before mounting your new disc, remove any debris, dirt or oil residue from the surface of the hub to ensure a smooth flat mounting surface for the new disc.
  • Torque the mounting screws to the specifications provided by the vehicle manufacturer.
  • Make sure that the caliper is properly aligned, perpendicular to the rotor, to avoid excessive drag.
  • Check the condition of the caliper to ensure that it is free of foreign debris, all the pistons move freely, and it slides or moves properly on any pistons or pins.
  • WARNING: check pad wear when replacing your disc. Excessive pad wear will result in reduced brake performance and possible damage to your new disc. It is highly recommended that you replace your brake pads at the same time as fitting a new brake disc - in fact, if you don't it might void your brake disc manufacturer's warranty.
  • Proper bedding in is essential for the optimum performance of your new brake disc and brake pads. Begin by applying the brakes slowly and progressively until you have reached maximum braking. Avoid sudden sharp and hard braking until you are sure that your new disc and pads are properly bedded in.
  • Check your brake pads and discs regularly for wear and tear and to ensure even and complete contact between the pad and disc.

Disc fitment information from our mechanic Norman Grout

Removing discs - the Norman Grout method!

Due to both manufacturer's over-zealous lock tightening and reaction between metals in the fixing screws over time, a bit of controlled violence is often necessary to remove the old disc. Hit the bolts hard before trying to undo them and use good quality unworn tools for the job. Sometimes drastic measures are needed, perhaps a small chisel and a BIG hammer. Welding a large bolt to a destroyed bolt head is not unknown. Good luck, take your time and in the overused words of one major workshop manual publisher it should be easy:
'simply disassemble by removing all fasteners and use the opposite process to reassemble.'

Created with Sketch.
Back To Top