Project IT175F week 2
Jerry's been in the garage again - for many hours - but what great work!
Jerry Rulf
Well I ended last week's story with a feeling of relief that I'd found no stripped threads... ah... more of that later-meanwhile this is what has been happening so far with my IT175F rebuild ...
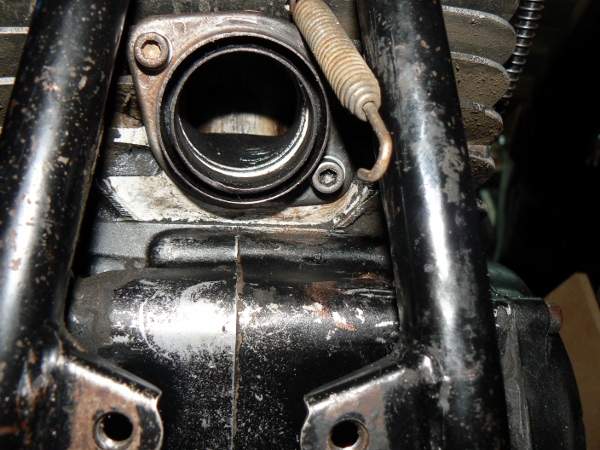
First off, I cleaned the exhaust out, mended the top rubber mounting bracket, and put it back on, minus the silencer (still waiting for baffle and end cap).
The exhaust gasket was interesting, in that everybody seems to list it as 46mm - I tried this and it didn't fit, and the internal bore encroached on the port and gas flow. A 45mm, as listed by Wemoto was perfect.
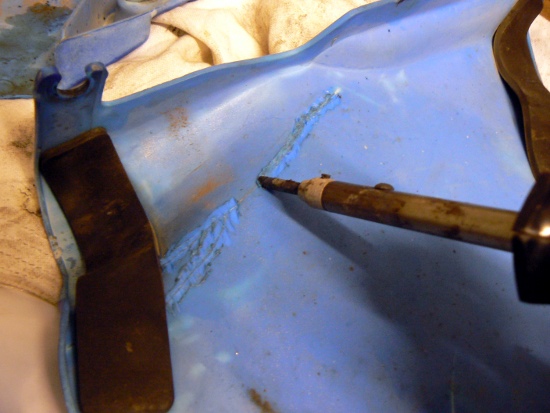
Then I tackled the broken plastics. I was going to use fibreglass and strengthening bits of thin alloy plate, but instead thought I'd try to weld it up using an ordinary 25w soldering iron
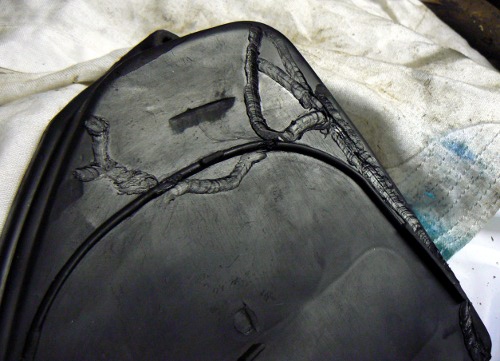
It worked a treat, so I also did the airbox cover-
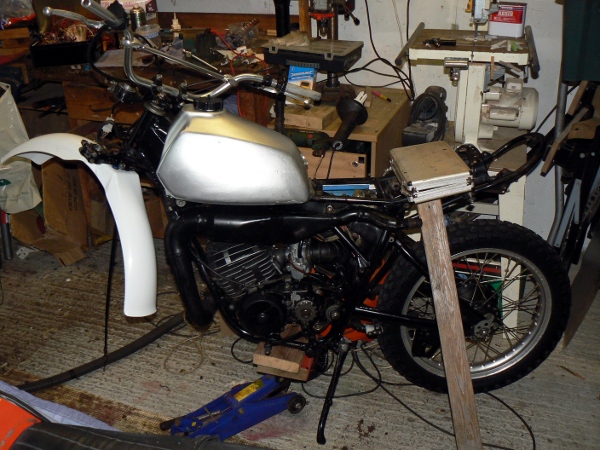
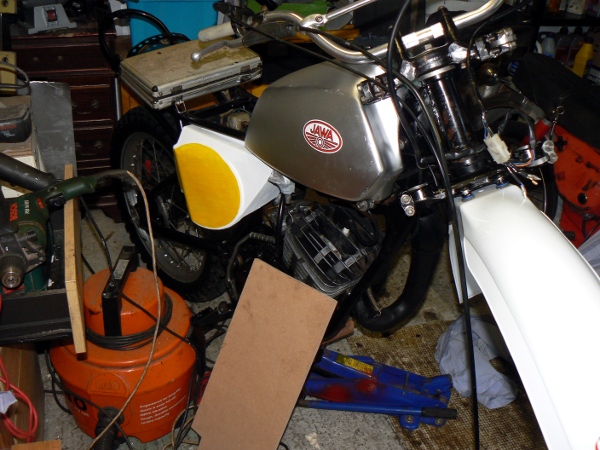
The UFO vintage enduro mudguards arrived, and luckily they look pretty much a perfect fit, and are the style I wanted. I rubbed down the tank and sprayed it with some acrylic silver I had handy, and then decided it would look alright as a fake mid 70s Jawa ISDT bike... so I sent off for a couple of tank stickers.
The rear spokes haven't arrived yet, so I tackled the front end.
One of the forks had a slight crease and bend where it enters the lower yoke- I might get away with that.
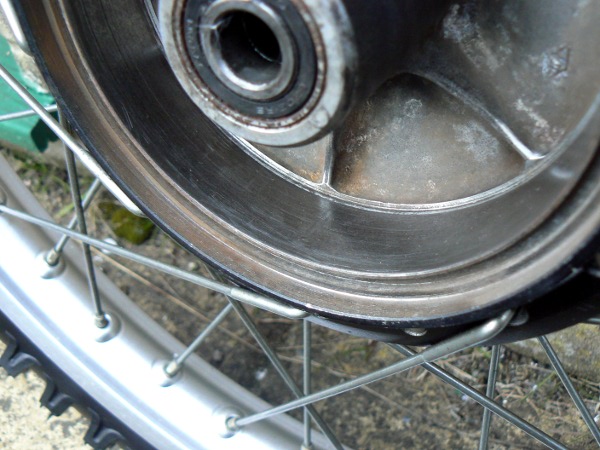
The front drum face was rusty, particularly in the patch that was obviously at the bottom when it was left for ages.
I don't have a lathe to skim it, so did what I have done many times before, and carefully scraped it back to good with a new scalpel blade. You can achieve a better finish this way than with abrasives.
I'm not scared of fettling with hand tools, as I grew up watching my dad easing out main bearing shells with his set of metal scrapers (when do you ever hear of them anymore?). A lost art.
The tail light in the mudguard was disappointing- it was 12v, with festoon bulbs and no facility for a stoplight.. so I found another of the same style on the Wemoto site, and fitted that, and I'm very happy that it looks oldie!

fits perfect!
Now to the sheared off bolts... under the bottom yoke where front mudguard bolts on, was a sheared off M6 bolt, in alloy, flush with the blind hole.
Now the good news, it moved, wobbled, and with a little manipulation with a tiny micro screwdriver, came out! Hoorah!
The same thing happened with 2 others, (dry american air prevented a build up of white furry gunge in the threads), but there are still 2 unimportant sheared bolts in the back loop of the frame that need to be sorted.
I brush painted the sidepanels with acrylic to see what they'd look like. Ok I think.
The tapered steering head bearings were good but dry, so I sorted that out and adjusted them.
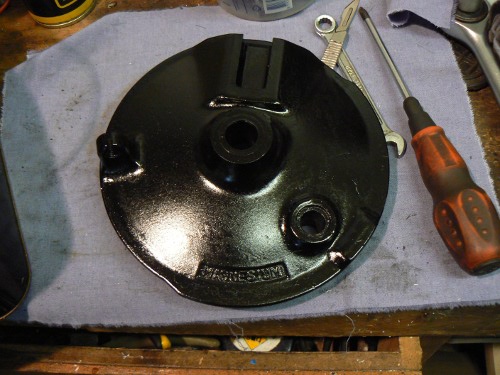
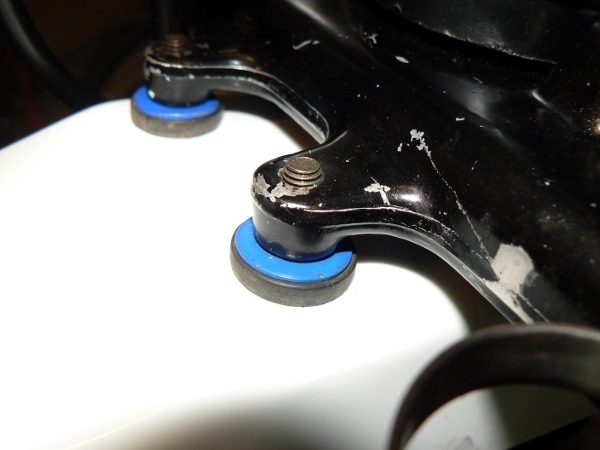
The front brake plate was bare, so I painted it. The shoes were good.
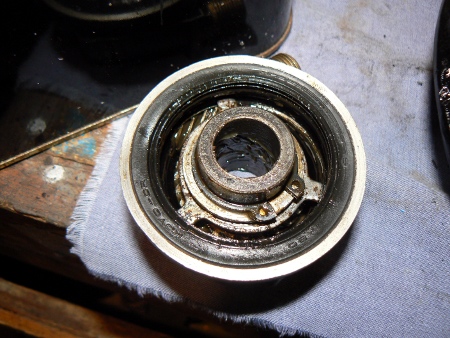
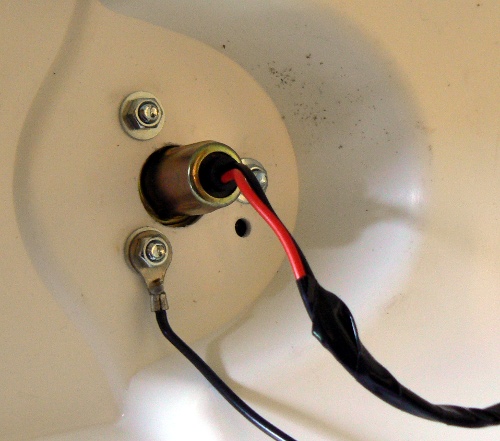
This speedo drive took me 2 hours to get fixed! It was stuck solid due to not being used or connected for years. All smooth and lovely now.
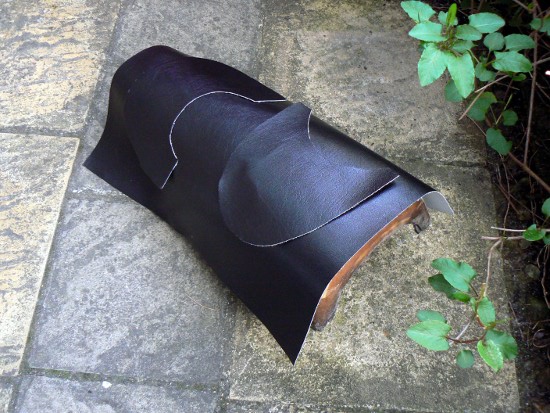
I made a pattern in paper, then bought vinyl from the local haberdashers for £11 and cut out parts for new seat cover. I included hems (I've been watching the Great British Sewing Bee).. I am currently trying to badger my significant other into sewing it together.
So, all kind of ok, but I also found a loose spoke with a totally seized nipple on the front wheel.. more bother and time waiting for a new spoke or set i've now got to order, probably from USA, before I can change the tyres and put it together..
The wiring is in for the tail light, but I still have to make a stop light system from scratch- not sure whether to do front or back- it will be whatever seems easiest!
Check out last week's story to see how far he's come already
"Whoops I did it again"

 EN
EN TH
TH UK
UK